
Older homes possess an undeniable soul. From handcrafted millwork and grand archways to character-rich hardwood floors, vintage architecture offers a warmth and craftsmanship that modern construction often struggles to replicate. However, living in a house built fifty or a hundred years ago can come with significant daily compromises. Rattling windows, drafty rooms, inadequate electrical outlets, dark and boxy room layouts, and finicky plumbing systems can quickly turn a dream property into a constant source of frustration.
Modernizing an older home does not mean stripping away its historic character or converting it into a sterile box. Instead, successful modernization is about strategic integration—upgrading the underlying mechanical infrastructure, enhancing thermal performance, and incorporating resilient, low-maintenance finishes that seamlessly harmonize with the original aesthetic. By focusing on smart, phased improvements, you can elevate your day-to-day living experience, reduce energy expenses, and preserve the architectural integrity that made you fall in love with the property in the first place.
Securing the Overhead Structure Against Leaks and Thermal Loss

Before investing a single dollar into interior upgrades, modernizing an older home requires securing the building envelope against moisture intrusion and climate extremes. The overhead structure is your first line of defense. Older framing often carries heavier loads than modern timber, but decades of exposure can compromise rafters, flashing, and underlayments. Inspecting the attic space for moisture staining, inadequate insulation, and poor ventilation is essential. When attic space lacks proper air circulation, trapped humidity causes wood rot and winter ice dams that back up under shingles. Partnering with reputable roofing contractors ensures that structural load calculations are checked before adding heavy modern insulation packages or solar panels, and that historical flashing details around chimneys are properly sealed.
- Inspect attic framing and roof decking during or immediately following a heavy downpour to identify active leaks or water staining before they penetrate living areas.
- Upgrade attic insulation levels to meet current R-value recommendations (typically R-38 to R-60 depending on climate), taking care not to block soffit vents.
- Install continuous ridge and soffit ventilation systems to equalize interior roof temperatures and prevent moisture condensation in seasonal extremes.
- Examine step flashing and counter-flashing around brick chimneys, dormers, and vent stacks for corrosion, loose mortar, or deteriorated sealant.
Mitigating Exterior Hazards to Protect Foundations and Maximize Natural Sunlight
Moving beyond the roofline, the exterior environment directly impacts your home’s structural health, indoor climate, and natural lighting. Dense vegetation planted decades ago may have matured into massive structural threats. Overhanging limbs shed leaves into gutters, trap ambient moisture against lap siding, and block sunshine from entering vintage sash windows. Furthermore, invasive root systems can penetrate stone foundations, disrupt original exterior drainage, and damage underground utility lines. Engaging certified tree services to prune hazardous limbs creates a safe perimeter while opening up natural light channels into dark interior spaces.
- Maintain a minimum clearance of ten feet between large tree branches and the roofline to prevent shingle abrasion and pest entry.
- Prune lower branches and dense canopy sections to allow sunlight to reach perimeter walls, speeding up drying after rainstorms.
- Clear root zones that encroach on vintage stone, brick, or unreinforced concrete foundations to minimize structural shifting.
- Clean and re-pitch perimeter gutters to ensure rainwater discharges at least six feet away from the home’s foundation walls.
Expanding Electrical Capacity to Handle Modern High-Draw Appliances
True daily comfort in an older home relies heavily on modernizing invisible systems: power distribution and temperature management. Many structures built prior to the 1970s feature electrical panels rated for only 60 or 100 amps. Today’s households—equipped with induction cooktops, dedicated home offices, electric vehicle chargers, and high-efficiency heat pumps—require at least 200 amps of service. Beyond panel capacity, legacy wiring systems like knob-and-tube or ungrounded cloth-sheathed lines pose serious fire risks and cannot safely power modern sensitive electronics. Retaining a licensed electrician to evaluate your service panel, ground outlets, and replace hazardous wiring ensures safety while providing dedicated circuits where modern life demands them most.
- Upgrade main electrical service from legacy 60/100-amp panels to a modern 200-amp breaker panel equipped with surge protection.
- Replace vintage two-prong outlets with grounded three-prong units and install GFCI protection in kitchens, bathrooms, and outdoor spaces.
- Add dedicated 20-amp circuits for high-draw appliances like microwave drawers, hair dryers, and space heaters to prevent breaker trips.
- Install smart dimmers and low-voltage LED recessed lighting designed to fit shallow ceiling joists without disturbing historic plaster work.
Restoring HVAC Efficiency for Uniform Year-Round Temperature Control

Climate control presents another major challenge in older properties. Architectural layouts with closed doors and thick plaster walls often lead to extreme temperature stratification—uncomfortably hot upper floors in summer and drafty, freezing ground floors in winter. Restoring climate performance starts with servicing existing systems before making major modifications. Addressing worn burners, faulty blowers, or rusted heat exchangers through comprehensive heating repairs ensures your base heating plant operates at peak efficiency. Once the primary heat source is performing reliably, supplemental systems can be introduced to eliminate stubborn cold spots.
- Seal accessible duct joints with foil tape and mastic duct sealant to prevent heated or cooled air from leaking into unconditioned basements.
- Install programmable smart thermostats equipped with wireless remote room sensors to balance temperatures across multi-story layouts.
- Incorporate ductless mini-split heat pumps in room additions or top-floor bedrooms that traditional ductwork struggles to reach efficiently.
- Bleed air from hot water or steam radiator systems annually to restore full thermal circulation across all radiator fins.
Brightening Dark Interiors with Washable, Moisture-Resistant Wall Finishes
The visual appeal and daily upkeep of an older home depend heavily on the quality and durability of its interior surfaces. Plaster walls and aged drywall often feature uneven textures, hairline cracks, and years of dingy, light-absorbing paint layers. Restoring these surfaces requires meticulous preparation rather than quick cosmetic cover-ups. Using low-VOC paint formulas with high Light Reflectance Values (LRV) can transform dim, compartmented rooms into open, vibrant sanctuaries. Hiring experienced painting contractors guarantees that aged plaster is properly stabilized, skim-coated, and primed with high-adhesion masonry primers before applying durable finish coats that resist scrubbing and moisture.
- Apply flexible mesh tape and setting-type joint compound over plaster stress cracks to prevent them from telegraphing through fresh paint.
- Choose eggshell or satin finishes for living spaces to maximize washability without highlighting subtle imperfections in hand-troweled plaster walls.
- Use light-reflective color palettes with an LRV of 60 or higher in narrow hallways and north-facing rooms to amplify natural window light.
- Encapsulate historical lead-based paint layers using approved elastomeric primers before applying fresh decorative topcoats.
Installing Low-Maintenance Flooring Over Uneven Subfloors
Flooring upgrades in older homes require materials that accommodate structural settling without failing. Original hardwood floors, while charming, may be thin from decades of sanding, squeaky due to subfloor movement, or susceptible to water damage near exterior entryways. Modern composite materials offer an ideal solution for high-traffic zones, blending authentic textures with extreme water resistance and flexible backing materials. Installing modern vinyl flooring allows you to achieve the look of natural wood or stone while gaining 100% waterproof protection and superior impact resistance over minor subfloor variations.
- Screw down loose wooden subfloors directly to joists using specialized floor screws to eliminate annoying structural squeaks before laying new floors.
- Apply a self-leveling underlayment compound over dips and slopes to create a smooth, flat surface for click-lock plank installation.
- Incorporate sound-dampening acoustic underlayment pads beneath floating floors to reduce footstep noise transmission between upper and lower levels.
- Choose planks with a minimum 20-mil wear layer for high-use entryways, mudrooms, and hallways to prevent scratching from pets and debris.
Maximizing Vertical Storage and Improving Ergonomic Layouts

In historical architecture, kitchens were designed purely as functional service spaces rather than central family gathering hubs. Consequently, older kitchens often feature awkward layouts, insufficient counter prep space, and shallow cabinetry that wastes valuable ceiling height. Modernizing the kitchen requires optimizing every square inch of available space while keeping ergonomics in mind. Custom or semi-custom kitchen cabinets equipped with full-extension pull-out trays, corner lazy Susans, and vertical tray dividers turn compact layouts into highly efficient cooking spaces without needing to knock down structural load-bearing walls.
- Extend upper cabinetry all the way to the ceiling line to capture underutilized vertical storage for seasonal serving items.
- Replace static lower shelving units with deep pull-out drawers that bring heavy pots and pans directly to your fingertips.
- Integrate concealed pull-out trash and recycling centers within standard base cabinet footprints to clear floor space in narrow kitchens.
- Choose soft-close hinges and heavy-duty drawer slides rated for at least 75 pounds to withstand daily family use and heavy cookware.
Restoring Main Line Flow Before Installing Heavy-Duty Appliances
Behind those stunning new countertops and storage solutions lies a complex plumbing network that must be revitalized before installing high-demand modern appliances. Decades of cooking oils, soap scum, and mineral scale collect inside original cast-iron or galvanized steel drain lines, narrowing their interior diameter and slowing wastewater evacuation. Connecting modern high-pressure dishwashers or garbage disposals to choked plumbing lines creates immediate risks of backups and water damage to new floor surfaces. Scheduling professional clogged drain cleaning and camera line inspections eliminates blockages and verifies pipe integrity before new fixtures are installed.
- Perform a video camera inspection of the kitchen main drain line to locate root intrusion, sagging pipes, or severe mineral scaling.
- Hydro-jet aging drain lines to scrub away accumulated grease and sludge, restoring full pipe diameter before adding new appliances.
- Replace galvanized steel branch lines under the kitchen sink with modern PVC or PEX materials to improve water flow and prevent pinhole leaks.
- Install dedicated shut-off valves and leak-detection auto-shutoff sensors under the dishwasher and sink for immediate burst protection.
Creating an Open Visual Flow in Small Bathroom Footprints
Bathrooms in older homes are notoriously compact, often measuring a modest five by eight feet. Opaque shower curtains, built-in tub enclosures, and dark tile walls can make these small spaces feel claustrophobic and gloomy. Modernizing a vintage bathroom involves visual expansion techniques that maximize light distribution while improving daily maintenance. Installing frameless shower glass doors removes visual barriers, allowing natural and ambient light to flood across the entire room while giving the illusion of a significantly larger floor plan.
- Replace heavy opaque shower curtains or framed sliders with frameless tempered glass panels to create an uninterrupted line of sight.
- Apply factory-treated glass protective coatings that repel water spots, mineral buildup, and soap scum for effortless maintenance.
- Utilize curb-free or low-profile shower thresholds to eliminate tripping hazards and create a seamless transition into the wet area.
- Incorporate recess-mounted medicine cabinets and floating vanities to open up floor area and boost spatial efficiency.
Upgrading Wet Zones with Waterproof, Ultra-Durable Surfaces
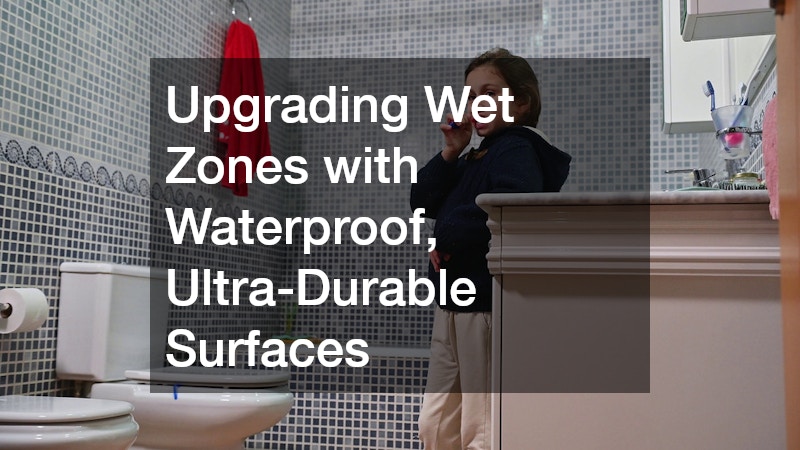
Alongside visual openness, the durability of bathroom surfaces under continuous humidity is paramount. Older subfloors are especially vulnerable to water leaks around toilets, tubs, and shower enclosures. When replacing worn floors or shower surrounds, choosing non-porous, highly dense materials ensures long-term resistance to water damage, mold growth, and cracking. Installing dense porcelain tile provides a waterproof, stain-resistant surface capable of mimicking luxury natural marble or slate without requiring constant sealing or delicate maintenance routines.
- Apply a continuous waterproof membrane (such as a sheet or liquid-applied system) over cement backer board before tiling shower walls.
- Choose matte or textured surface finishes with a high dynamic coefficient of friction for bathroom floors to prevent slipping when wet.
- Use high-performance stain-resistant epoxy or urethane grouts in shower enclosures to prevent mold penetration and discoloration.
- Uncouple tile installations from aging wood subfloors using an uncoupling membrane mat to prevent floor settling from cracking tile grout lines.
Modernizing an older home is a deeply rewarding journey that blends historical craftsmanship with the luxuries of contemporary design and engineering. By systematically prioritizing structural security, upgrading foundational utilities, and choosing durable, modern finishes, you create a living environment that is as functional and comfortable as it is beautiful. Remember that successful renovation does not have to happen overnight; tackling your home’s modernizations in logical, phased stages allows you to manage project budgets effectively while minimizing disruption to your daily routine. By addressing essential exterior protections and hidden mechanical systems first, you build a solid, reliable foundation for every beautiful interior transformation that follows. With thoughtful planning, high-quality materials, and expert guidance, your classic property will provide effortless comfort, safety, and joy for generations to come.