
Stepping across the threshold of a new house brings an unmistakable rush of excitement, right up until you walk back outside and inspect the yard. Whether you purchased a brand-new build finished in identical beige siding with three lonely foundation shrubs or a resale property whose previous owners left behind neglected beds and a bare concrete slab, the exterior rarely feels like yours on day one. Most residential exteriors are designed for broad neutrality rather than personal character, leaving homeowners staring at a blank canvas that feels unfinished, exposed, or disconnected from how they want to live.
Personalizing the outside of your home elevates the comfort you feel every time you pull into the driveway while building lasting property value. The secret to a stress-free transformation lies in tackling upgrades in the right sequence. Structural prep, grading, and boundary work should always come before delicate plantings, while outdoor living rooms make the most sense once shade, drainage, and sightlines are settled. This phased roadmap walks you through every zone of your property so you can invest wisely and create an exterior that reflects your lifestyle.
Deep-Clean Siding, Brick, and Concrete Before Making Cosmetic Upgrades

A thorough exterior wash acts like a reset button for your property, revealing true surface colors and exposing minor maintenance issues before they become costly repairs. Newly built homes carry drywall dust, clay splash-back, and manufacturing oils that prevent finishes from bonding, while resale homes accumulate oxidized chalk and mildew. Mismatched pressure-washer nozzles can etch concrete, force water behind lap siding, or strip granules off shingles. Working with experienced local power washing companies takes the guesswork out of matching water pressure and biodegradable detergents to each material on your lot. Walk the perimeter after surfaces dry and complete these checks:
- Confirm low-pressure soft washing for delicate cladding: Vinyl siding, painted clapboard, stucco, and cedar shakes need gentle chemical treatments with low-pressure rinses rather than high-PSI blasting that gouges fibers or breaks window seals.
- Target high-traffic flatwork separately: Concrete driveways, brick walkways, and stone walls benefit from rotary surface cleaners that lift tire marks, rust stains, and moss evenly without wand stripes.
- Inspect caulk lines and trim joints once grime is cleared: Washing exposes cracked window glazing, separating fascia boards, and early wood rot near porch columns so you can seal gaps before moisture enters framing.
Modernize Siding, Trim, and Front Entryways with Layered, Warm Color Palettes
Once exterior surfaces are spotless, color becomes the fastest way to break free from neighborhood uniformity. Homeowners are moving away from stark whites and cold grays toward grounded, organic palettes—such as warm mushroom taupe, soft putty, muted olive, and clay neutrals paired with charcoal trim or stained wood accents. For multi-story gables, cedar shakes, or masonry requiring breathable coatings, hiring professional exterior painting services ensures proper priming, crisp cut lines, and uniform coverage that withstands UV exposure. Keep these guidelines in mind when selecting shades:
- Test large sample boards across different exposures: Paint two-by-two-foot boards and move them between sunny south-facing walls and shaded north-facing walls from morning through dusk to observe undertone shifts.
- Coordinate with fixed architectural elements first: Pull subtle undertones from roof shingles, brick chimneys, or foundation stone so your palette harmonizes with materials you plan to keep.
- Follow a 60-30-10 color balance across the facade: Dedicate roughly 60 percent of the visual field to your main siding hue, 30 percent to trim and soffits, and 10 percent to a standout front door and shutter accent.
Define Perimeter Privacy and Security Without Blocking Natural Light
Whether you need a secure enclosure for kids and pets, a visual buffer from a busy street, or a clear sense of where your sanctuary begins, perimeter boundaries change how comfortable your backyard feels. Completing fences and hard surfaces before planting also protects new beds from heavy equipment. Before choosing a style, check your property survey for lot lines, verify municipal height limits, and review neighborhood rules. Partnering with reputable fencing contractors ensures posts sit below the frost line, gates swing smoothly without sagging, and transitions across sloped terrain look intentional. Use these strategies to achieve privacy while keeping your yard airy:
- Match materials to maintenance goals and architecture: Horizontal cedar boards bring warm contemporary lines, powder-coated aluminum preserves sightlines toward wooded views, and composite panels resist warping and fading without annual staining.
- Step down heights near front approaches: Use six-foot solid panels along rear and side living zones for seclusion, then transition to four-foot open picket or rail styles closer to the streetscape so the house stays inviting.
- Plan wide double-drive access gates early: Include an eight-to-ten-foot double gate along a side yard so landscapers or utility crews can move compact equipment into the backyard without dismantling panels.
Grade Slopes and Build Permanent Walkways, Steps, and Retaining Walls
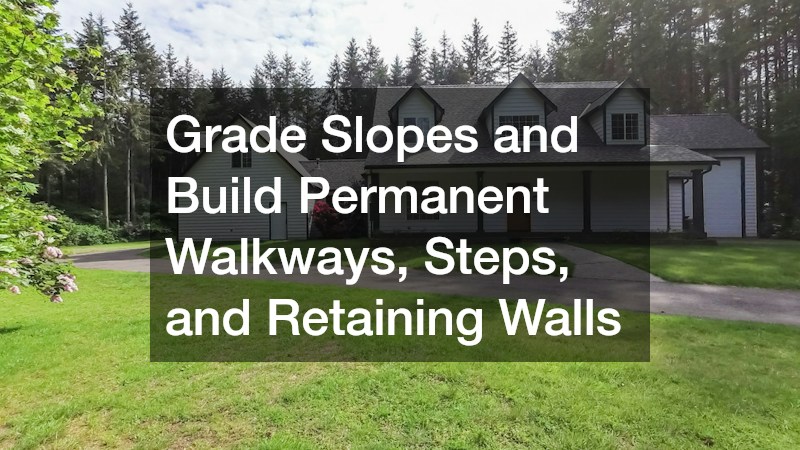
A great exterior feels effortless to navigate, guiding guests naturally from the driveway to the front door and linking side yards to backyard gathering spaces. Builder-grade properties frequently skimp on flatwork, leaving narrow three-foot sidewalks and steep side slopes that wash out during storms. Experienced hardscaping services can reshape problematic runoff patterns, terrace sloped backyards with engineered stone retaining walls, and replace cramped front stoops with generous landings. Prioritize durability and craftsmanship as you map out hard surfaces:
- Build wider walkways for comfortable side-by-side movement: Expand primary front entry paths to four or five feet wide so two people can walk together without stepping onto wet grass or border beds.
- Choose permeable pavers for problem drainage zones: Permeable interlocking pavers and natural flagstone set over open-graded aggregate allow rainwater to filter into the subsoil, reducing puddles and foundation splash-back.
- Embed low-voltage lighting during construction: Running conduit beneath steps and walkway edges while stone is laid hides wiring completely and casts warm illumination across elevation changes after dark.
Map Sun Exposure, Drainage, and Four-Season Sightlines Before Planting
Once fences, retaining walls, and stone walkways anchor your lot, softening those structural lines with greenery brings warmth and seasonal rhythm to your property. Buying plants purely for spring bloom often leaves a bare yard from November through March. Creating resilient, balanced landscape designs starts with observing how light, wind, and water move across your lot before digging. Sketching sun pockets and interior window sightlines ensures beds look compelling from inside the house as well as from the street. Build a four-season framework with these steps:
- Track sun patterns across the day: Note which beds receive six or more hours of afternoon sun versus morning sun or dappled shade, since misjudging light exposure causes scorched foliage and sparse blooms.
- Layer plants in three vertical tiers: Anchor the back of foundation beds with evergreen shrubs for year-round structure, weave mid-height perennials and ornamental grasses through the center, and finish front edges with spilling groundcovers.
- Space plants for their mature five-to-ten-year spread: Leave 18 to 24 inches of breathing room between mature shrub canopies and your siding to prevent trapped moisture, insect bridges, and blocked windows.
Hand-Select Native Perennials, Ornamental Shrubs, and Specimen Trees Locally
Where you buy plants matters nearly as much as where you place them. Mass-market garden centers often ship generic stock grown hundreds of miles away under heavy greenhouse fertilizers, leaving plants stressed once they hit native soil. Visiting regional plant nurseries connects you with horticulturists who understand local soil pH, winter hardiness zones, and regional pest pressures, while offering native cultivars that thrive with minimal care. Bring yard measurements when shopping and follow these habits:
- Prioritize native and drought-adapted varieties: Indigenous perennials, serviceberries, viburnums, and ornamental grasses support pollinators and birds while requiring far less supplemental watering and fertilizer once established.
- Inspect root systems before loading your cart: Gently slide smaller containers off to verify white, fibrous roots rather than thick, circling roots that strangle the plant over time.
- Buy and plant in odd-numbered drifts: Grouping perennials in clusters of three, five, or seven creates natural sweeps of color rather than the cluttered look caused by buying single specimens.
Inspect, Prune, and Protect Existing Mature Trees Early in Ownership

If your property came with established shade trees, you already own an irreplaceable asset that adds architectural maturity and lowers summer cooling bills. However, construction on new builds or deferred care on older lots often leaves trees with compacted root zones, girdling wires, or dead limbs over rooflines. Scheduling an early walkthrough with certified tree services gives you a clear baseline of canopy health, identifies storm-damaged branches before high winds hit, and establishes a pruning schedule that preserves natural tree architecture. Adopt these tree-care practices during your first year:
- Eliminate mulch volcanoes around every trunk: Pull piled mulch back so the flared base of the trunk stays visible and dry, keeping mulch rings three to four inches deep and away from bark.
- Avoid trenching or storing heavy materials inside the drip line: Delicate feeder roots live in the top 12 inches of soil extending out to the canopy edge; compacting that zone suffocates roots and triggers decline.
- Request structural crown thinning rather than topping: Selective pruning removes crossing branches and opens wind pathways through dense foliage without ever hacking off main leaders.
Install Hydro-Zoned, Weather-Smart Watering Systems to Cut Waste
Dragging kinked garden hoses across newly mulched beds every evening gets old fast, and inconsistent hand-watering is the top reason newly installed sod and shrubs fail during their first summer. Modern lawn irrigation companies design customized hydro-zoned networks that deliver the exact moisture each plant group needs, eliminating soggy lawn patches alongside parched foundation beds. Request these high-efficiency features when planning an automated system:
- Separate turf zones from drip-irrigated planting beds: Grass requires overhead rotary coverage, whereas shrubs, perennials, and vegetable gardens thrive with under-mulch drip tubing that delivers water straight to root zones with minimal evaporation.
- Integrate Wi-Fi weather controllers and soil-moisture sensors: Smart controllers pull local rainfall data to skip scheduled cycles automatically when rain falls or temperatures drop, trimming outdoor water use significantly.
- Include accessible shutoff and winterization ports: Properly placed brass isolation valves and blow-out connections protect underground piping from freeze damage and simplify seasonal maintenance.
Build Multi-Level Outdoor Platforms Tailored to How You Host and Relax
Once your property has clean surfaces, solid boundaries, layered plantings, and reliable irrigation, the backyard becomes a true extension of your indoor floor plan. A simple rectangular slab or cramped landing rarely encourages people to linger outside, whereas a multi-zone platform tailored to how your family cooks, dines, and unwinds creates effortless indoor-outdoor flow. Collaborating with experienced deck contractors lets you maximize awkward yard elevations, integrate hidden structural fasteners, and incorporate under-deck drainage systems that keep lower patios dry. Use these design details to elevate your platform:
- Zone the footprint around specific activities: Dedicate a corner near the back door for grilling, carve out a central area for a six-person dining table, and tuck built-in bench seating along a perimeter edge for lounging.
- Compare capped composite boards with thermally modified wood: Capped composite decking resists fading, staining, and splinters for decades with simple cleaning, while thermally modified ash or cedar offers rich grain and cooler underfoot temperatures.
- Choose slim cable or black aluminum balusters: Swapping bulky wooden pickets for slender matte-black metal balusters or stainless steel cable rails opens unobstructed views of your landscaped backyard.
Add Screened or Four-Season Sunspaces for Bug-Free, Year-Round Use

Even the best-designed open-air yard can sit empty during peak mosquito season, spring pollen waves, or sudden afternoon downpours. Bridging the gap between interior comfort and outdoor scenery with enclosed patios allows you to enjoy fresh air, backyard views, and natural light across three or four seasons without battling insects or unpredictable weather. Tailor your covered outdoor room to your climate with these upgrades:
- Select the right enclosure system for your climate: Motorized retractable screens disappear into overhead housings when bugs are absent, vinyl-glazed four-track window panels block wind and pollen during shoulder seasons, and insulated low-E glass sunrooms create year-round living rooms.
- Upgrade flooring for durability and barefoot comfort: Porcelain pavers, textured stamped concrete, or weather-rated composite planks handle humidity swings effortlessly and pair cleanly with washable outdoor area rugs.
- Layer airflow, warmth, and dimmable lighting: Install damp-rated ceiling fans to circulate summer breezes, recess warm-toned LED can lights on dimmer switches, and mount overhead infrared heaters to extend usability into crisp autumn evenings.
Personalizing your new home’s exterior does not require tearing everything up in a single chaotic month or draining your savings before unpacking your boxes. Approaching your property as a phased master plan keeps every dollar working in harmony: start by cleaning and refreshing exterior surfaces, establish clear perimeter boundaries and permanent stone walkways, layer climate-adapted trees and perennials backed by smart watering, and finish with comfortable outdoor living rooms designed around how you love to spend your time.
Grab a notebook this weekend, walk every corner of your lot at morning and dusk, and list the three exterior updates that would improve your daily life most right now. Tackling one foundational step at a time turns an ordinary, builder-grade exterior into an inviting, deeply personal landscape that grows richer and more rewarding with every passing season.